The Way to Attach and Remove Men’s Lace Hair System
Views: 2937
The lace hair system is really popular among all the hair systems used by men around the world. The system "Full lace hair" is designed for those who need the best of nature. The Lace Hair System is light, breathable, and comfortable; it is hard to feel when you wear it. The high degree of natural appearance provided by excellent hair makes it very desirable all over the world.
WHY MEN CHOOSE LACE HAIR SYSTEM
The lacing system of hair is a thin base. People are looking for an equally good presence and the highest opinion. The light to medium heavyweight hair density is well suited. The lace hair system is very natural, very breathable, and unseen; make sure it is comfortable regardless of the weather.

HOW TO ATTACH A LACE HAIR SYSTEM
As we all know, lace systems are soft, invisible, and breathable, which is a good choice for customers who work or sweat a lot and also want to look good. Below you will find some suitable tips to help you adapt to your home.
STEP 1: PREPARING A NEW LACE HAIR SYSTEM
• Cut the base according to your standards.
• Cut the extra side along the hairline.
• Wet your hair before cutting the extra side to better control your hair. When the hair is dry, it can easily be cut accidentally.
• Clean and the lace hair system.
STEP 2: PREPARE THE SCALP
• Remove your old hair system. Spray the product on the edge of the old hair system and then start removing the product from the back to avoid damaging it.
• Clean your head off any residual adhesive or tape with a towel or damp cloth and use a stripper if necessary.
• Wash the head at least twice to make sure it is clean.
• Dry the scalp thoroughly, using a hairdryer if possible, to remove excess moisture.
• Collect all hair or hair in the area around you.
• Thoroughly clean the grip area with alcohol-based detergent and cotton wool.
• Use an eyebrow pencil to mark a few points on the scalp along the edge of the system, making sure the hairline is 4 fingers above the eyebrows.
• It is recommended to apply a protective layer on the scalp to protect the skin and promote adhesion with adhesive tape.
STEP 3: APPLICATION OF THE TAPE
• Spray alcohol on the edges where the pieces of adhesive tape are applied and dry them thoroughly.
• Apply the pieces of the adhesive tape to the outside of the edges.
• The use of lace tape is recommended. If you use glue, you can apply an extra layer of glue after applying the tape. Do not apply the glue directly onto the laces.
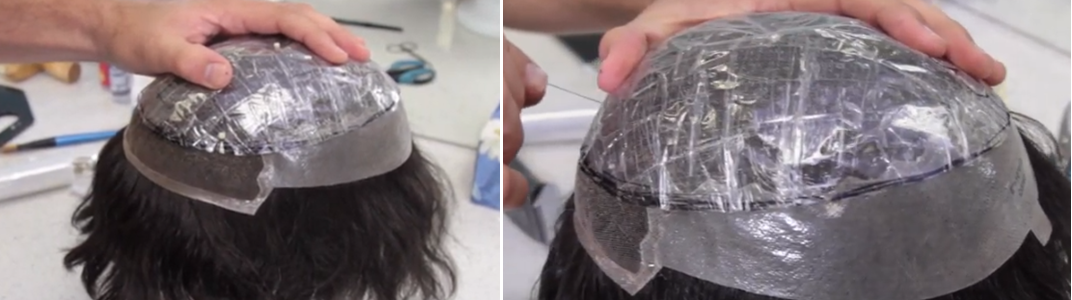
STEP 4: FIXING THE NEW LACE HAIR SYSTEM
• Carefully position the system from the hairline forward at the marked points, making sure that the hair is held in place so that it does not touch the strap.
• Stretch it a little during application to avoid air bubbles.
• Once the correct position is found, use a flat edge of the ridge to press firmly against the scalp for 1 minute.
• Keep the system dry and sweat-free for 24 hours after application.
REMOVAL TIPS:
• Spray the solvent all around and wait a few minutes for the tape to come off.
• Gently lift the base of the scalp. To avoid damaging the forehead, we recommend always removing the lace hair system from the back of the front.
HOW TO CLEAN MEN’S LACE HAIR SYSTEM
We use a technique called "Mirror Slide" to effectively clean the lace. This may seem a bit elementary, but it is effective in removing residues from the lace and is widely used in the professional hair replacement industry - a great tip from the inside!
• Using a home mirror, gently push the lower part of the side part (the cleaning part) to the top of the mirror.
• Then gently push the system towards you along the mirror. Now note that there is some glue residue on the mirror.
• Clean the adhesive residue from the mirror with isopropyl alcohol and paper towels.
• Repeat this process until all hair systems are clean.
CONCLUSION
Using a lace hair system is one of the best ways to hide hair loss. The hair system is available in different sizes and shapes.


Leave a reply