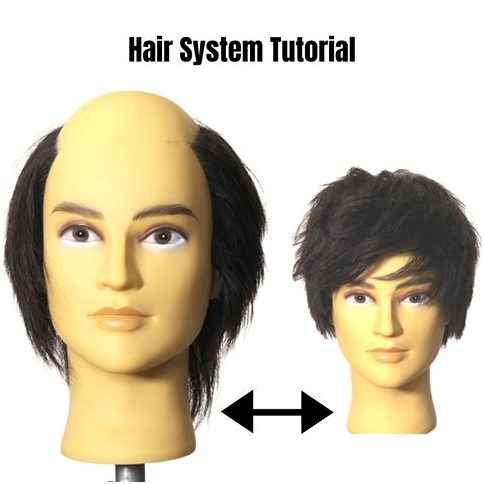
How to Achieve A Medium Length Layered Haircut with A Toupee?
Views: 1772
With this hair unit, what I'm going to do is to create a look where I blend in this hair system hair with the rest of this hair and create a longer and like a Kylo Ren haircut on this. The front hairline of this unit is so thick right here, so it may not be the best for showing an exposed hairline.
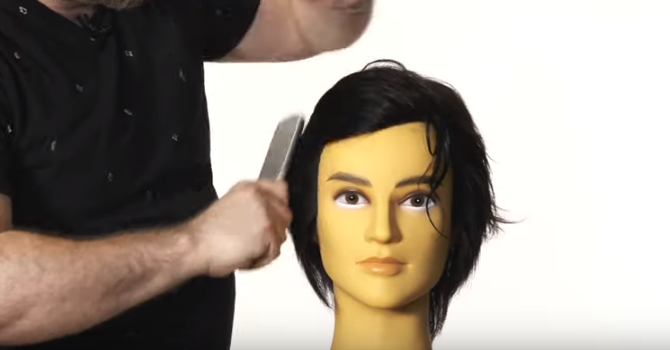
What I'm doing next is I'm use my spray bottle and I'm literally just combing through the hair getting all of the hair nice and saturated.
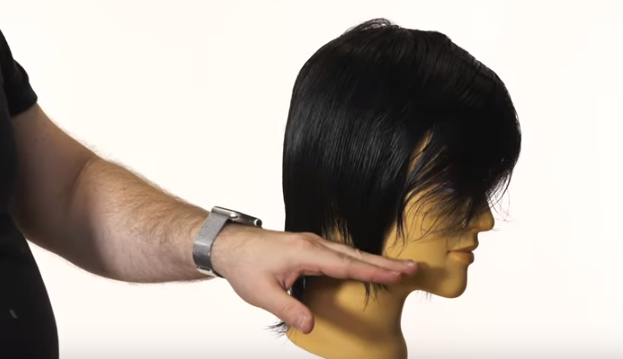
In order to create really ideal haircut for this, you want to look at the entire length. You can see here this is way longer. there's a huge gap right in through here then we've got this so in order to strengthen this whole line up we have to actually create a look and cut off all this excess hair and work it down into a shape this way.
Let's start in the back and I'm going to cut it right there. I'm literally just cutting this straight across. Next what we're going to do is we're going to focus on the side area right in through here. I want to make sure that we're creating a solid flow between the top and the bottom and I'm looking for the thin areas and I'm saying myself where can I cut this to actually make strengthen it so let's go right there one snip and we're good to go. As you can see in through here you've now connected the shape and it looks much thicker but we have to continue on working towards the front. So I'm going to comb this all straight down and here is where the magic happens. As far as creating the look in the front, you want to make sure that the end result is going to reflect the kind of look that you want. What you don't want to do is cut the front too short or not cut it enough. So my goal is to create kind of a moving sweeping type of look that I can brush over to the side this way and have a little bit of texture with it and and I have that vision in my head.
The same thing on this side here we're going to comb it all straight down, so now we're going to connect this side same exact thing. I'm combing the hair towards me creating my angle and now I'm cutting upwards like so the face frame into here is probably most important part as well because this is the first thing everybody sees is the front of your head. So this really is crucial that you have a really good solid foundation in the in the front because people see the back of your head but at the same time this is the first thing people see already.
So now what we're going to do is we're going to focus on the layering. I going to layer this so I do want to have a good amount of layers in this. I don't want to have it too short but I don’t want to have it too long either, so that's where we're cutting our first layer right into here. Now that is going to be our guide for the entire back of the head.
So now I'm combing the hair straight out and I'm gonna be cutting it straight out from the head going all the way down into the length. What's great about this because it's human hair it literally feels as good as people’s own hair. It feels incredible and it's got a great condition to it. So now we're going to continue on this side right into here and the back.
When you're cutting this, you got to make sure you're cutting this just like a normal head of hair. Don't get intimidated, discouraged or freaked out. You treat it that way, it's gonna really help big-time. So what's happening now is I'm working into the corners in through here and that's where I'm removing all that excess weight and that's what's gonna help the hair lay much better and not be so heavy.
The key to the haircuts is that you need to make sure you cut everything because if you don't go all the way down to the bottom, this is just gonna look like a big chunk of hair.
Next, I'm going to now reverse and I'm going to cross check my work and also go back to make sure that every piece is cut now going in this way right here. I'm seeing a lot of hair that still needs to be cut and layered.
If it is still a bit heavy in some areas but that's where we go back in with the thinning shear and that's where we can change it up a little bit and make it a bit more textured.
Now that the back is done. Let's lower this down so you guys can see and it's time to connect this into this so we got our first layer before when we cut this and now what I'm going to comb this straight up and there's my guide from before and then there's a hair that needs to be cut so we're going from here to here you have to connect going from the back to the top back of the head I'm not even killed calling up the top yet this is the top back of the head and this is the crucial part to connecting any sort of haircut.
Now that we can move forward now leave the past behind and we're going to move forward this way. Here is where I'm going to take everything section by section and work right down the middle going towards the front and now I can clear clearly feel the difference in the hair texture between the back and the bottom and this because this is again 100% human hair it's in great condition and it's really easy to work with so as we get towards the front you don't want to skip out on any sections so as you work towards the very front what you want to make sure that you do is comb every single piece up and layer
every single section it's very important that you layer every single section because you don't want this to be too heavy right you don't want this to ever be too heavy and even though it's going to be a bit longer you need to have some sort of flow to it alright so the top is done here.
Now it's time to work in through the corners. We're connecting now the top in through the corners and then the sides. This is the very side, so we got top corners and sides everything has to be counted for when it comes to cutting this hair. The top the corners and the sides all need to be cut. I'm coming all the way down here on the very bottom and that's all hair and weight that needs to be cut. The very bottom that's the length but what's above that is weight that just was going to make it look so heavy and that's how you get that more layered look and that softer look. So once again going all the way down to the very bottom here making sure that we're getting rid of any sort of excess pieces that are a bit heavier a bit longer. What I like to do is just cross-check everything especially in the front to make sure that every hair is cut and every hair is blended in the haircuts. It is looking good and it's flowing good.
Finding a good hair stylist who understands this is the key to it all. So there we go there again all by feel and by making sure that this is all connected in and worked in nicely. So here we can see a much better bigger difference than before if anything is too blunt just go in there and slice it up a little bit so it looks a bit softer okay now let's blow-dry it all right I think this came out pretty awesome.
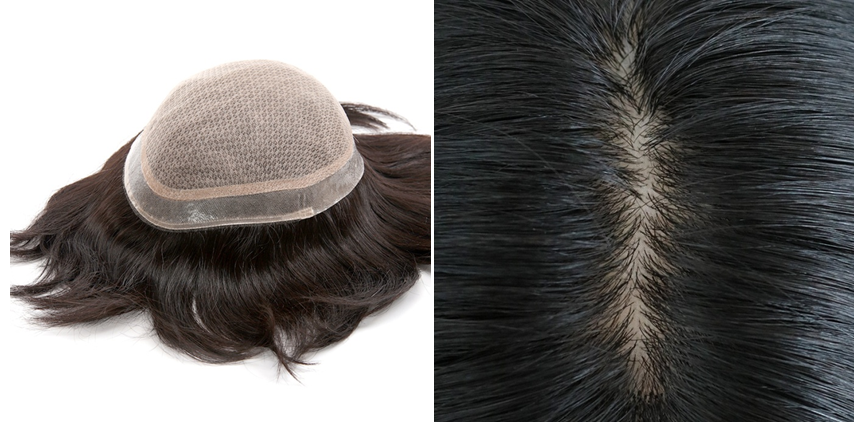
So I just want to show you guys again. Let's look at the scalp up close as you could see the scalp and again what makes this really unique is how that looks like any human scalp right into here which is pretty awesome. I have to admit it looks pretty awesome.
If you are interested in purchasing anything from lavividhair.com, use code THESALONGUY and you'll get 15% off of your order. That's pretty incredible and they have such a huge variety of hair units and different types and all poly base in different colors. They're really incredible. That's why I'm excited to work with them on this.
Should you have any questions, please feel free to contact support@lavividhair.com for help. Their experts are happy to help you.


Leave a reply